Creating & Editing Reports #
Each report configured on the system can be configured to more closely meet specific requirements. A report is defined by the following settings:
- Details
- Filters
- Field
- Sorting
When creating a new report instance, a report template must be selected and the report instance must be given a name to uniquely identify it within the workspace.
Details #
Template Selection #
Report templates define what data the report will be accessing and how the data will be modelled. There is a large range of templates to choose from when creating a report which provide different views of the call data.
Each template defines a list of available fields, so the template must be selected first before the fields to display on the report can be configured.
To help when selecting a report template, they have been grouped into types:
| Report Types | Description | Reports Available |
|---|---|---|
| Call Lists | View lists of individual calls or call segments. Call lists can show all the details stored about each call and can be filtered to find specific telephone calls. | - Segmented - Lost Calls - Unreturned Lost - Non-segmented |
| Time-based | View call traffic summarised by date and time. Time based reports are useful for tracking performance and traffic to identify patterns. | - Summary by Day - Summary by Day & Time - Summary by Week - Summary by Month - Summary by Time - Trunk Usage |
| Caller ID & DDI | View calls summarised by the telephone numbers involved in the calls, caller ID, DDI and dialled numbers. Identify the top dialled numbers, which customers call the most and spread of incoming calls across DIDs. | - Summary by Number - Summary by DDI |
| User & Device | View calls summarised by the user or device that was involved in the call. Monitor user performance and compare performance between users. | - Summary by User - Summary by Device |
| Agent & Queue | View call and status information for queues and individual agents. Compare team and agent performance including time on duty, time in wrap etc. | - Summary by Queue - Agent Summary |
For more information on the types of reports available, please refer to the Report Templates section.
info
Changing the template on an existing report will cause the fields selected to be reset back to the default ones for the new template.
Time Zone
The time zone of the communications platform is used by default for all reports. If required, this can be overridden to a specific time zone.
Filters #
To get the maximum benefit from reports, they can be filtered to only include the data required. This can include filtering by certain call parameters or device/users.
Default Filter
Select a filter to apply to the report each time it is run. The filter can be changed as required after being run, but it will always default back to this filter the next time it is accessed.
Default = None
info
Refer to the filters section for more information on creating/editing filters.
Default Date Range
The default date range the report should include data for. This can be a custom date range or a contextual one like Today, Yesterday, This Week etc.
Default = Today
Limit to time range
On summary reports, the time range for the data can be limited in order only show data from a specific time period each day that report is run for. this is useful for only showing data during working hours for example.
When enabled, set the Time from and Time to settings to match the required range.
For example, if the time range is limited from 9am to 5pm and the date range is set to Last Week, only data from between 9am and 5pm each day of the week would be included in the report.
note
Currently, the 'Limit to time range' and 'Weekday' filters do not work on the following report templates: 'Agent Away Reason Summary', 'Agent Status Detail', 'Agent Status Summary' & 'Agent Summary'.
Field Selection #
Each report has a default set of fields which are automatically selected to be displayed when the report is created. These 'Chosen' fields can be changed and reordered as required.
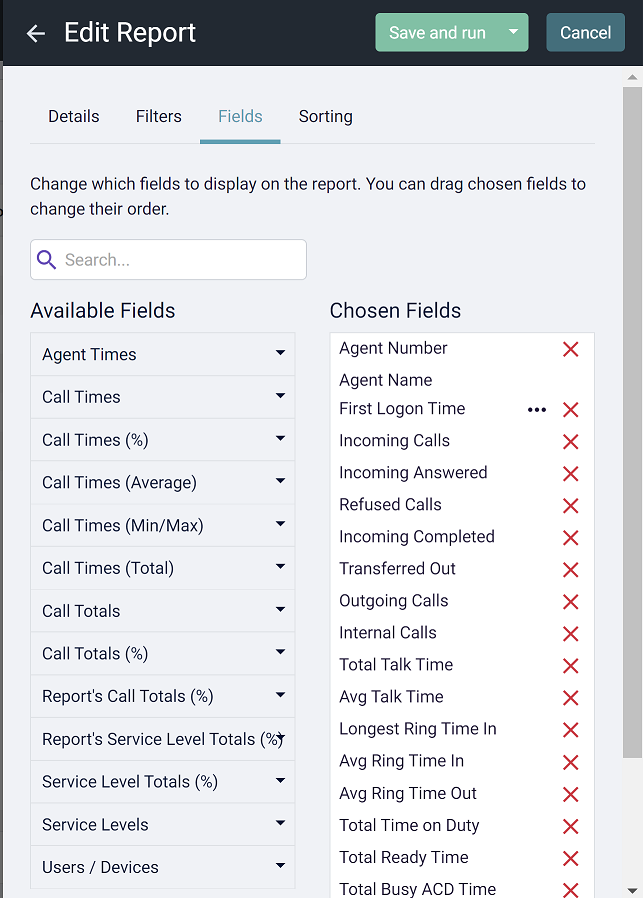
Fields can be removed from the report by clicking the red cross to the right of the field name in the 'Chosen Fields' area.
To add a new field to a report, identify the required field from within the 'Available Fields' section and click on the it (items in gray are already chosen).
For more information on all of the different fields available for selection, please refer to the Statistics section.
tip
Hover over the field names to view the description of the data provided.
Child Field Selection #
Some report templates support the selection of child fields. These are additional fields that are related to the main fields chosen for display. Where child fields they will be selectable from a dedicated section at the bottom of the fields section:
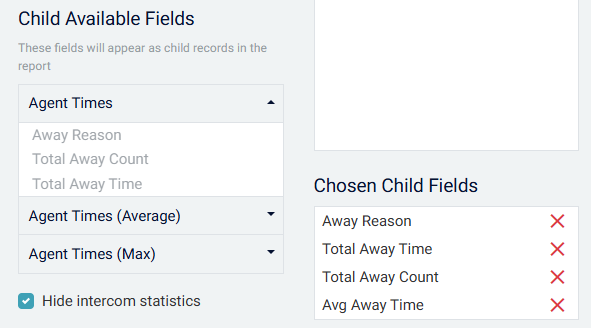
On the report, child fields can be access by expanding a row using the '+' icon on the left of the row. An example of a report with child fields is the 'Agent Summary' report, where a breakdown of away status is available as child fields to each row.
Date Formats #
When a field containing a date is added to a report, the format of how the date is displayed can be defined. To modify the format, press the more button and select one of the following formats from the context menu:
| Format | Example |
|---|---|
| Date & time | 5/25/21 7:02 PM |
| Date only | 5/25/21 |
| Time only | 7:02 PM |
| Date & time with seconds | 5/25/21 7:02:05 PM |
| Time with seconds | 7:02:05 PM |
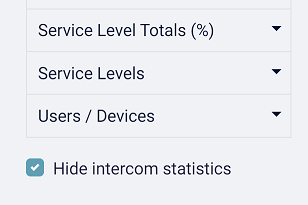
Intercom Statistics #
By default, fields containing data relating to intercom calls (internal calls) are hidden from the user interface. If data relating to internal call traffic is required, un-check the 'Hide intercom statistics' setting to expose the additional fields.
info
Intercom calls include announced transfers and internal calls to groups/queues.
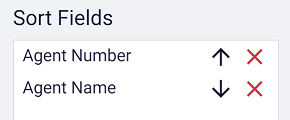
Sorting #
Each report can be sorted on one or more of the fields chosen for display. Sort orders can be applied to any of the displayed fields by selecting the field to add a sort direction and then using drag & drop to change the sort order or by clicking the arrow to change the sort direction.
The image below shows a report with two sort orders applied, each with different sort directions: