Customer Onboarding Process #
The onboarding process is the process of creating a new customer account on ~.Dimensions.~ along with any user accounts which will require access to the customer portal.
note
At this stage you should have completed the Reseller Account Onboarding Process. Customer accounts cannot be added to the Enterprise portal directly, only through a Reseller Portal.
The steps below outline the recommended process for onboarding a new customer.
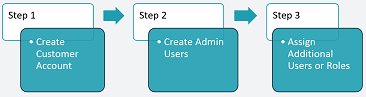
1. Create a Customer Account #
The first step of the process is to create the customer account record. This can be done using the Create Customer method.
The following information is required to complete this POST:
- Customer Name & Description
- Reference1
- PBX Connection Details
When creating the customer's account, the connection details for the PBX can be passed so the PBX connection is created at the same time.
2. Create Admin Users #
When the customer account is created in Step 1, the PBX connection will be activated and any user accounts that are present on the PBX platform will automatically be imported and attached to the customer's account.
The user accounts that are automatically imported will have their calls tracked and modelled by the ~.Dimensions.~ platform. By default, users will not have access to log into the customer portal to run reports or administer other users.
To allow a customer to manage their portal (manage user permissions, workspaces etc), one or more 'Admin' users must be created on the account.
To create an 'Admin' user, a new user can be added (using the Create User method) or one of the imported users can be updated (using the Patch User method).
info
Your process needs to handle a failed 'Create User' request if the user already exists on the system. If this happens, fall back to using the 'Patch User' method to apply the required roles.
Users require the following 2 permissions to be assigned to be an 'Admin' user:
- user.admin - Provides the user with the ability to manage other users on the customer's account
- customer.user - Provides the user with access to log into the customer portal
Once at least one user has been assigned the 'Admin' roles, other users can then be updated/added as required.
info
The admin user will not be able to see Workspaces unless they are also assigned a Supervisor role.
warning
An admin user must be assigned to the Customer Account before other users/roles can be amended. This is by design to ensure an admin user is always created.
3. Assign Additional Users or Roles #
Now that the Customer Account has been created and a user has been granted 'Admin' permissions, any other roles or permissions can be applied.
This includes the following actions:
- Enabling the ACD Agent (customer.user.acd) role on any users that require their agent events to be tracked
- Enable one of the Supervisor access roles (e.g. customer.user.supervisorl1) to any users that require access to run reports or view wallboards.
To add roles to a user, use the Patch User method.
info
To see the Workspaces and use the reporting call analytics of the solution, a user must be assigned one of the Supervisor roles.
For information on the different roles available, please refer to the User Schema.
-
The reference number is provided so that if there is already a unique ID that is used for the customer on a different system, it can be added to ~.Dimensions.~ to help identify the customer. This is different to the unique Tenant ID that will be created by Dimensions and which must be used when performing updates on the customer account. ↩︎